PiManager
![]()
PiManager is where you create your project, and manage the project’s sequences, shots and assets.
Usually a project is comprised of several sequences, and each sequence may include several shots.
The hierarchical structure is: Project >Sequence >Shot. Each hierarchy can have its own content of assets used under its scope.
The scopes of content are for easier asset categorization and management, but don’t limit the use of assets. Assets under any scopes can be added to any shots.
Following are the descriptions of PiManager UI components:
Content Path
This drop-down list shows the paths of your projects.
Select a path from the list and the items in the pane below will be updated.
You can add a new path by pressing the “+” button and selecting a directory.

To remove a content path from the list, select it and then click the “-” button. Removing a path will not delete any files or folders under the path. You may always add it back later.
Project Pane
This list shows the projects under the currently selected path. When you pick one of the projects, the Project Tree list on the right will be updated accordingly.
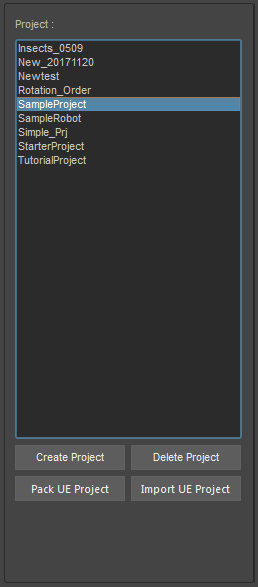
These buttons are available:
Create Project: Create a new project and its subfolders.
Delete Project: Delete the selected project.
The deleted projects can be found in the Recycle Bin and be restored.Pack UE Project: Collect and pack the shots and assets in the selected PiStage project into a regular UE project. Then you may open this project with Unreal Editor for further editing.
Import UE Project: Import the contents from other Unreal projects. Click this button to bring up the “Import UE Porject” window.
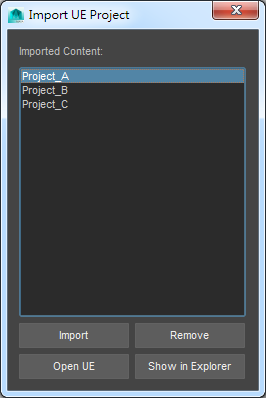
The “Imported Content” list shows the project names of the imported contents. You can “Import” or “Relmove" them. Click the “Open UE” button to open the currently selected project in Unreal Editor for checking the imported contents. The “Show in Explorer” opens the folder of the selected content in Windows File Explorer.
The folder structure of the project to be created is defined by the file config.ini which can be found in C:\PiSquare\PiStage\Maya\templates\project. If you want to customize the folder structure, please read the comments in the ini file carefully. Please make a backup before modifying the configuration. Once created, each project has its own config.ini file.
Note: Modifying the project’s config.ini after assets or shots are created should be avoided as it will damage the reference links that keep Maya and Unreal in sync.
Project Tree Pane
This tree list displays the subfolders of the current project in the following hierarchy:
Project
Sequences
Shots
The folders in green are those that may have content. Select one of them and the Content pane on the right will be activated.

The buttons:
Create Sequence: Create a new sequence and its subfolders.
Delete Sequence: Delete the selected sequence.
The deleted Sequences can be found in the Recycle Bin and be restored.Create Shot: Create a new shot and its subfolders. You have to select a sequence first, and then create shots in the sequence.
Delete Shot: Delete the selected shot.
The deleted Shots can be found in the Recycle Bin and be restored.Check Out Shot: Check out a version of the selected shot and open it in Maya as the current shot.
Check In Shot: Check in the current shot opened in Maya as a new shot version.
Note: The “Save Scene” Maya command just saves the Maya file of the current shot but no new version is made.
Save Shot As: Save the currently opened shot as another one. In this way, the contents and settings of a shot can be reused and modified for another shot.
Show in Explorer: Open the current folder in Windows File Explorer.
After creating a few assets, a usual shot workflow is:
- Create or select a sequence;
- Create or select a shot under the sequence;
- Check out the shot;
- Edit the shot.
- Save the shot Maya file or check in a new shot version.
Asset Pane
This list shows the assets of the current project, sequence or shot.
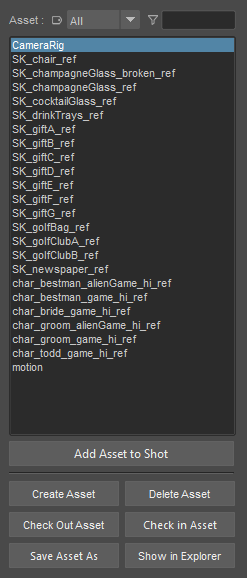
You can create and manage the assets with these tools:
Add Asset to Shot: Add the selected asset to the shot. You have to check out a shot first then you can add assets to the shot. The asset Maya files are actually referenced in the shot when you do this.
Note: An assets is referenced when added to the shot, and can be unloaded or removed from the scene. Please refer to Maya document: Unload and reload file references, Remove file references.Create Asset: Create a new asset. This creates the Maya file for this asset.
Delete Asset: Delete the selected asset.
The deleted assets can be found in the Recycle Bin and be restored.Check Out Asset: Check out a version of the selected asset and open it in Maya as the current asset.
Check In Asset: Check in the current asset opened in Maya as a new asset version.
Note: The “Save Scene” Maya command just saves the Maya file of the current asset but no new version is made.
Save Asset As: Save the currently opened asset as a new asset. Both its Maya and Unreal Engine files are duplicated and saved.
Show in Explorer: Open the asset folder in Windows File Explorer.
An usual workflow is
- Select a content location (a project, a sequence or a shot)
- Create or select an asset;
- Check out the asset;
- Create or edit the models, materials or the rig of the asset.
- Convert the asset using PiConverter.
- Save the asset Maya file or check in a new version of the asset.
There are two filters to help you find the asset:
Tag Filter
When you check in an asset, you may add tags to it,
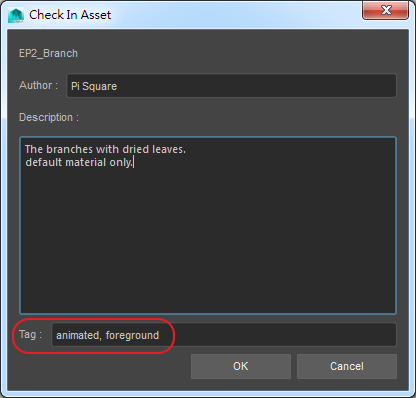
and then use the tags to filter the asset list later:

Name Filter
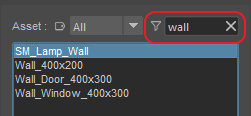
Type in the search box to filter the assets by their names. Click the “✖” mark to clear the search box